


Amazon Q Business is a fully managed, generative AI-powered assistant that helps enterprises unlock the value of their data and knowledge. With Amazon Q Business, you can quickly find answers to questions, generate summaries and content, and complete tasks by using the information and expertise stored across your company’s various data sources and enterprise systems. At the core of this capability are native data source connectors that seamlessly integrate and index content from multiple repositories into a unified index. This enables the Amazon Q Business large language model (LLM) to provide accurate, well-written answers by drawing from the consolidated data and information. The data source connectors act as a bridge, synchronizing content from disparate systems like Salesforce, Jira, and SharePoint into a centralized index that powers the natural language understanding and generative abilities of Amazon Q Business.
To make this integration process as seamless as possible, Amazon Q Business offers multiple pre-built connectors to a wide range of data sources, including Atlassian Jira, Atlassian Confluence, Amazon Simple Storage Service (Amazon S3), Microsoft Exchange, Microsoft SharePoint, Salesforce, and many more. This allows you to create your generative AI solution with minimal configuration. For a full list of Amazon Q Business supported data source connectors, see Supported connectors.
One of the key integrations for Amazon Q Business is with Microsoft Exchange. Microsoft Exchange is a widely used enterprise email and collaboration environment that contains a wealth of valuable information, including email conversations, attachments, calendar events, and contacts.
With the Microsoft Exchange connector, we are enhancing user productivity and streamlining communication processes within organizations. This integration empowers users to use advanced search capabilities and intelligent email management using natural language.
The Microsoft Exchange connector for Amazon Q Business providing a seamless way to index and query data stored in Microsoft Exchange. With this connector, organizations
- Centralized access to Microsoft Exchange data – Amazon Q Business allows you to configure Microsoft Exchange as a data source, providing a single, centralized interface to search and access information stored in your Microsoft Exchange repositories. This alleviates the need for users to navigate through individual email accounts or folders to find relevant data.
- Intelligent search and retrieval – Amazon Q Business uses advanced natural language processing and machine learning capabilities to enable intelligent, natural language-based search and retrieval of information from Microsoft Exchange. Users can ask questions or make queries in plain language, and Amazon Q Business will surface the most relevant responses and insights.
- Enhanced productivity and collaboration – By making it straightforward for employees to find and act on the information stored in Microsoft Exchange, Amazon Q Business can improve productivity and collaboration across the organization. Users can quickly locate key documents, contacts, or calendar events, and use that information to make more informed decisions and drive faster, more effective outcomes.
- Secure and compliant data access – Amazon Q Business provides a secure, compliant way to access and query Microsoft Exchange data. Amazon Q Business integrates with your organization’s identity provider (IdP) to make sure only authorized users can access sensitive information, and it maintains a detailed audit trail of all user activity.
- Streamlined workflows and decision-making – Amazon Q Business has the ability to generate summaries, answers, and recommendations based on Microsoft Exchange data, users can make more informed decisions and streamline various workflows, such as customer support, project management, and strategic planning.
By using the Microsoft Exchange connector for Amazon Q Business, organizations can unlock the full value of the data stored in their Microsoft Exchange repositories, empowering employees to work more efficiently, collaborate more effectively, and drive greater business impact.
In this post, we show how to index information stored in Microsoft Exchange and use Amazon Q Business to query your Microsoft Exchange data.
Microsoft Exchange connector for Amazon Q Business features
The following table gives an overview of the Microsoft Exchange connector for Amazon Q Business and its supported features. For more details, refer to Microsoft Exchange connector overview.

Solution overview
With Amazon Q Business, you can configure multiple data sources to provide a central place to search across your internal repository. For our solution, we demonstrate how to retrieve data from the Microsoft Exchange repository or a folder using the Microsoft Exchange connector for Amazon Q Business. The solution consists of the following steps:
- Configure a Microsoft Exchange application and gather connection details
- Create users and groups in AWS IAM Identity Center
- Create the Microsoft Exchange connector for Amazon Q Business
- Query Microsoft Exchange data using the Amazon Q web experience
- Troubleshooting
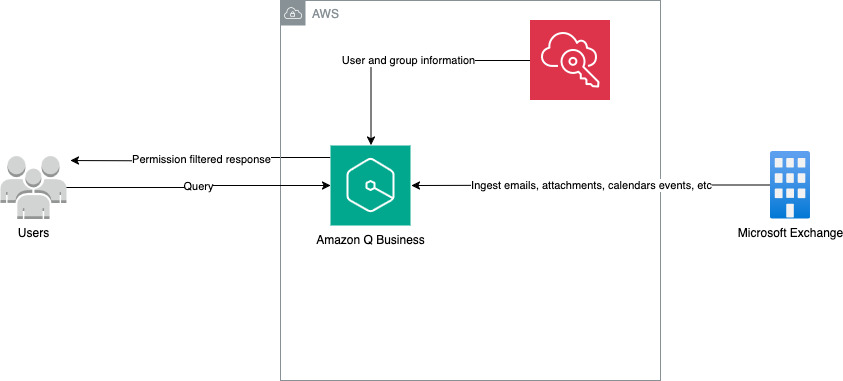
The following diagram illustrates the solution architecture.
Prerequisites
To configure the Microsoft Exchange connector for Amazon Q Business, you need to create a Microsoft Exchange account in Office 365.
Configure a Microsoft Exchange application and gather connection details
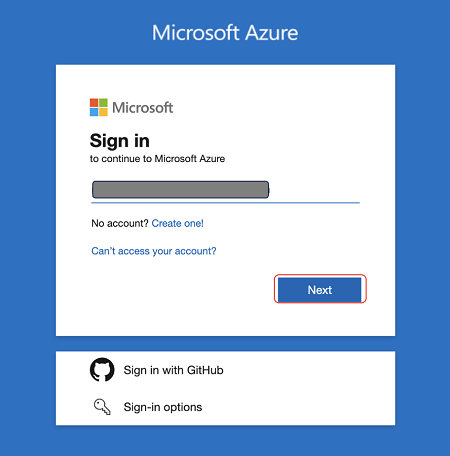
- Log in to the Azure portal using your global admin user account and choose Next.
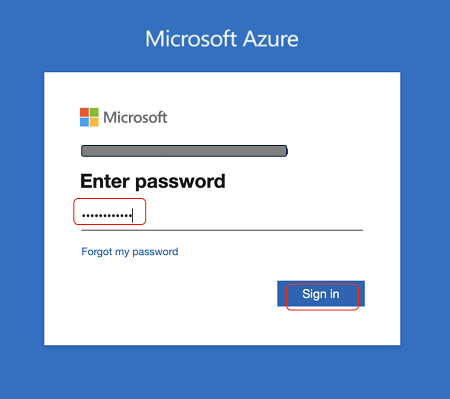
- Enter your password and choose Sign in.
- If multi-factor authentication (MFA) is configured, now authenticate using Microsoft Authenticator.

- Choose Yes to stay signed in.
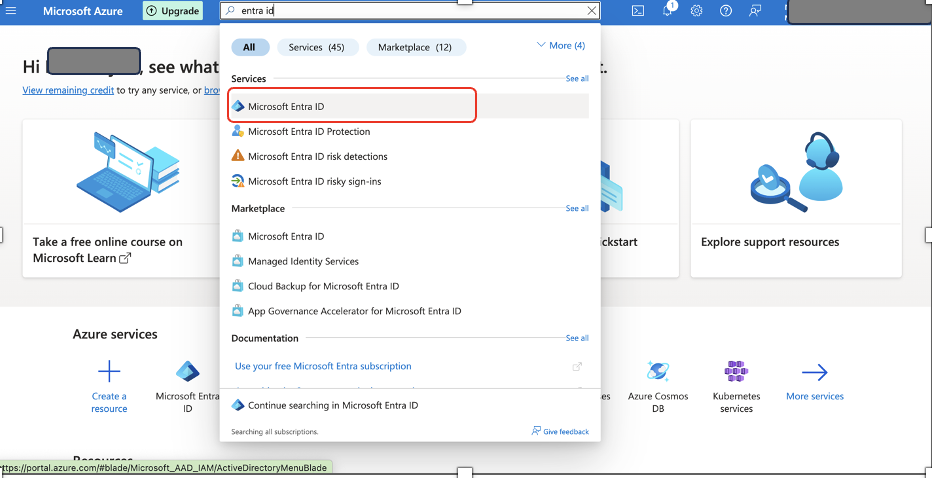
- On the Azure portal’s landing page, search for and choose Microsoft Entra ID.
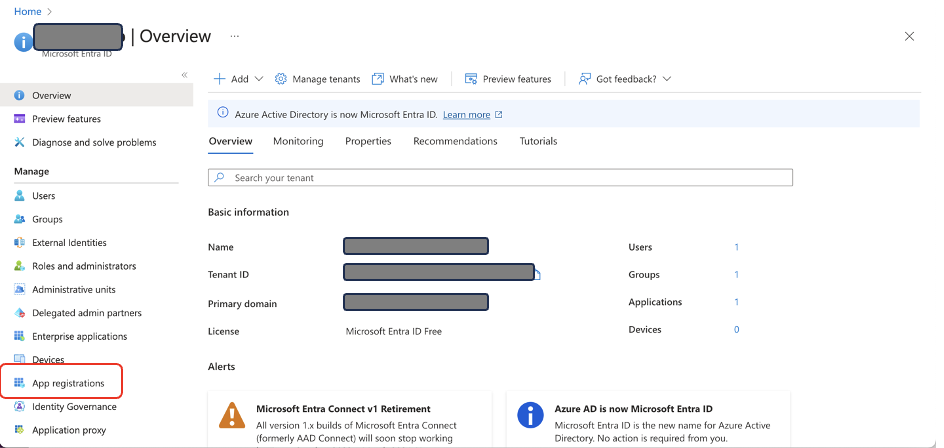
- On the Microsoft Entra ID service page, copy the value of Tenant ID.

- Choose App registrations in the navigation pane.
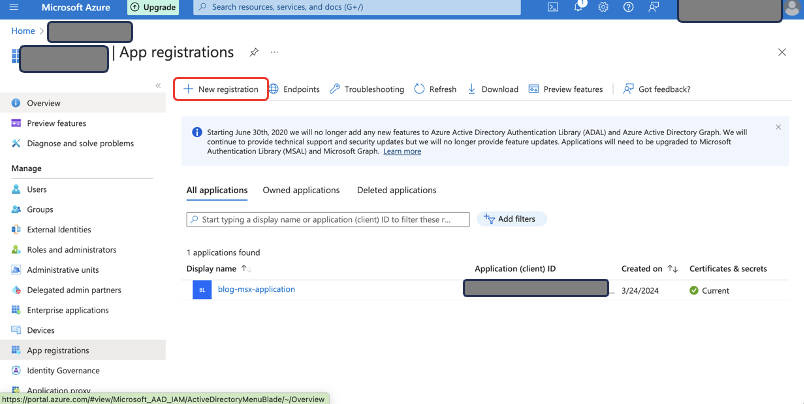
- Choose New registration.
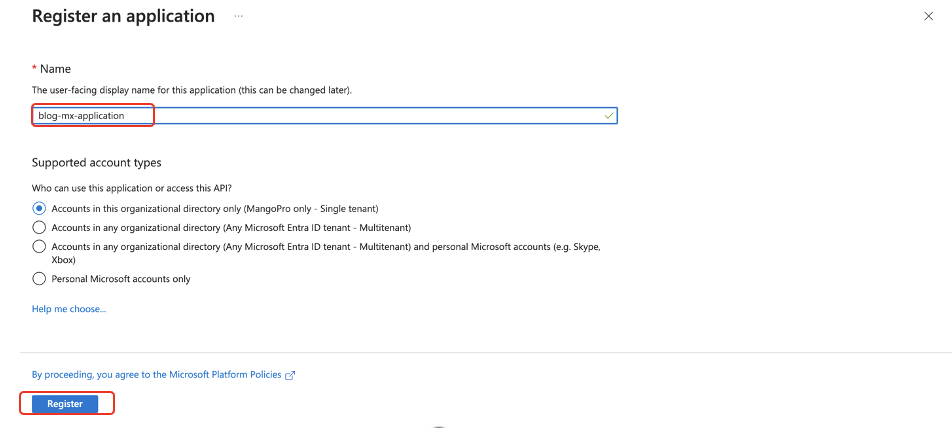
- Enter the name of your choice for Name, then choose Register.
After successful registration, you will land on the application page, as shown in the following screenshot.
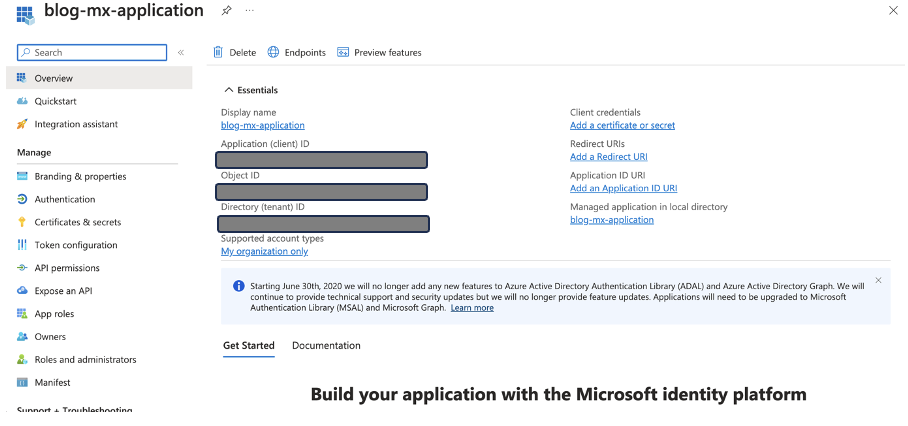
- Choose Certificates & secrets in the navigation pane.

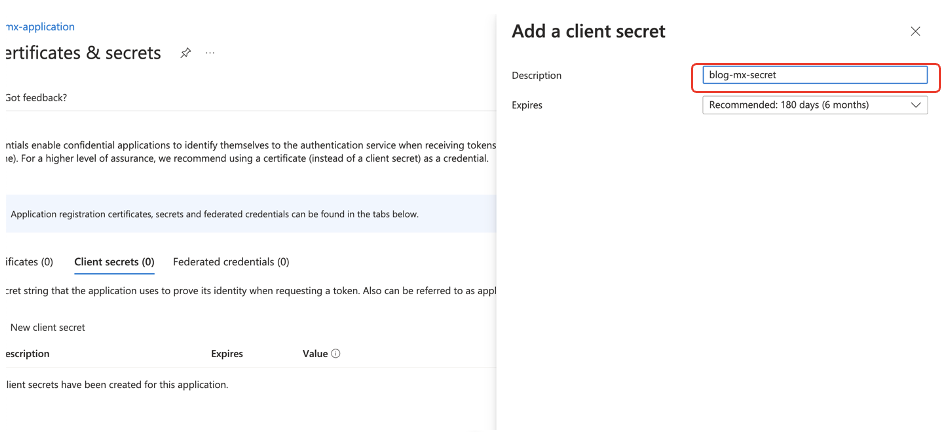
- Choose New client secret.

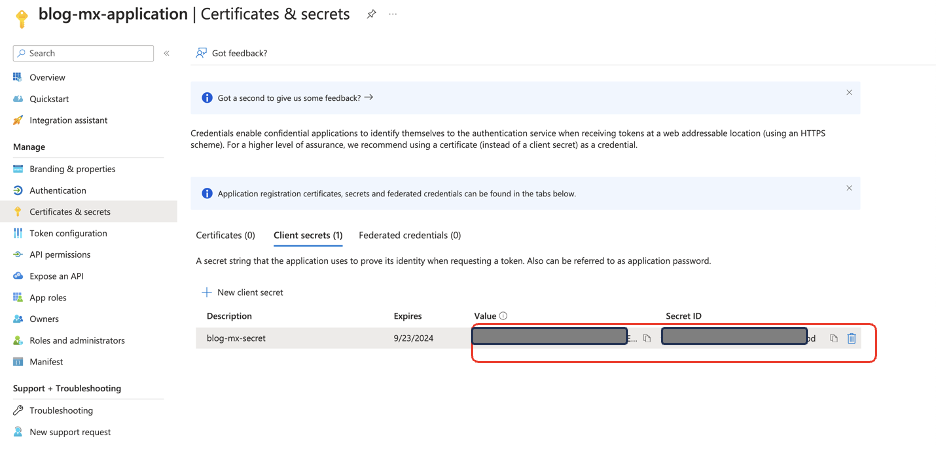
- Enter a description for the client secret for Description and choose Add.
- Make a note of the secret value and secret ID.
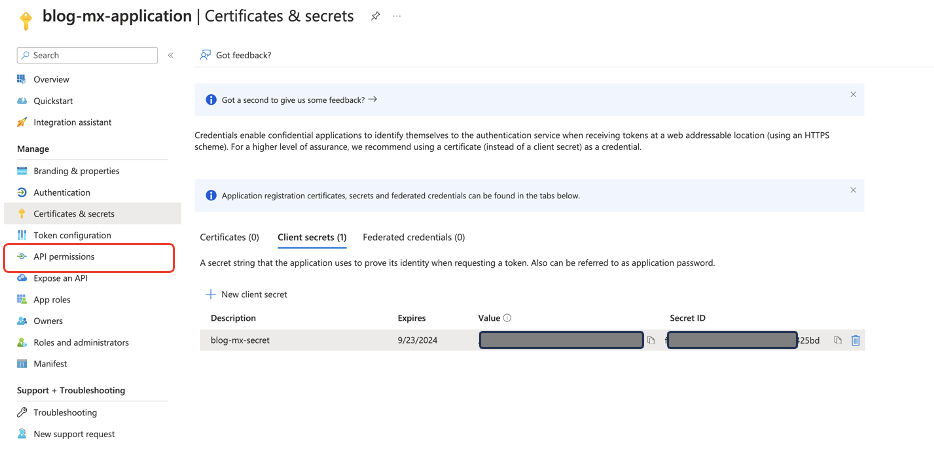
- Now configure API permissions by choosing API permissions in the navigation pane.
- For Microsoft Exchange Online, please make sure that you have Azure AD Premium P2 activated. This will make sure that the Microsoft Exchange Online is available as part of your organization APIs.
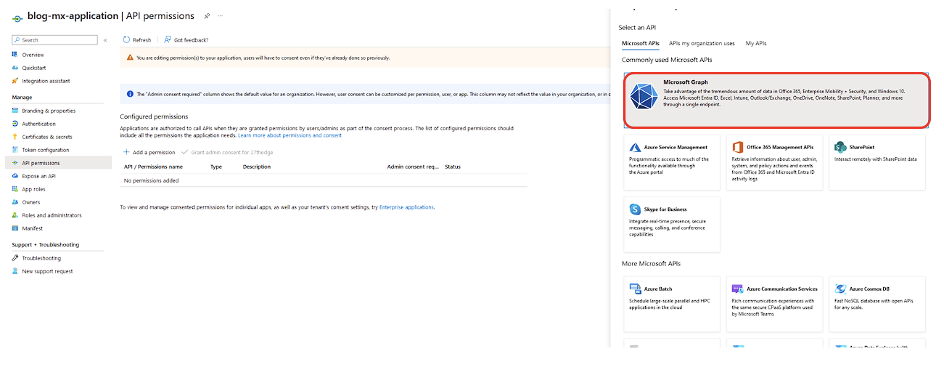
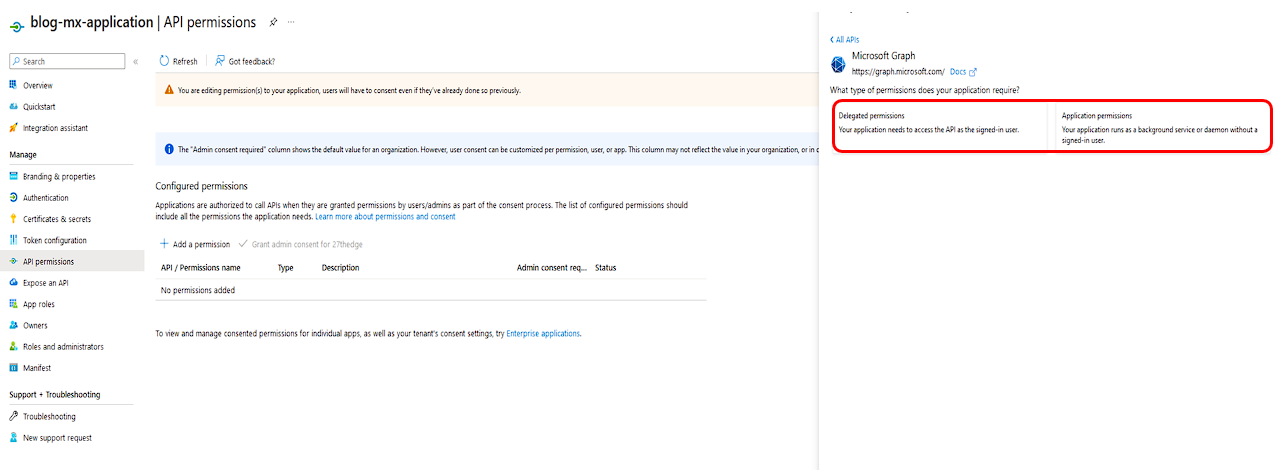

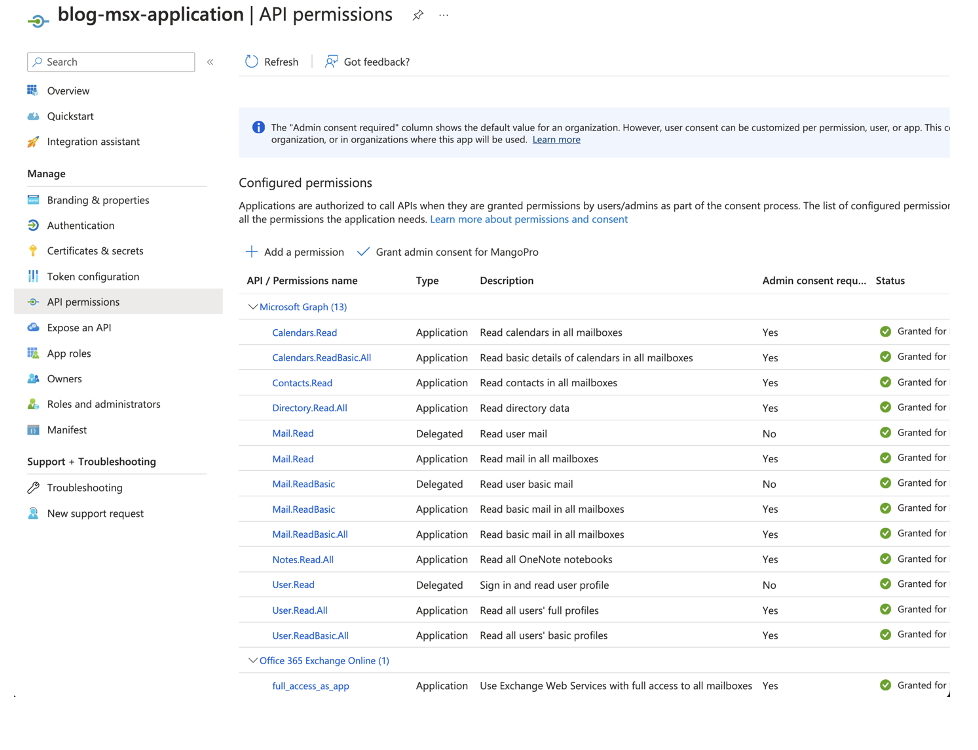
- Add the permissions to the APIs Microsoft Graph and Office 365 Exchange Online.
There are 13 permissions for Microsoft Graph and 1 permission for Office 365 Exchange Online.
Create users and groups in AWS IAM Identity Center
In this section, you create a user John Doe in AWS IAM Identity Center, who will be given permission to use the application.
To create your user, complete the following steps:
- Open IAM Identity Center console.
- If you haven’t enabled IAM Identity Center, choose Enable. If there’s a pop-up, choose how you want to enable IAM Identity Center. For this example, select Enable only in this AWS account. Choose Continue.
For more details, refer to Enable IAM Identity Center.
- On the IAM Identity Center console, choose Users in the navigation pane.
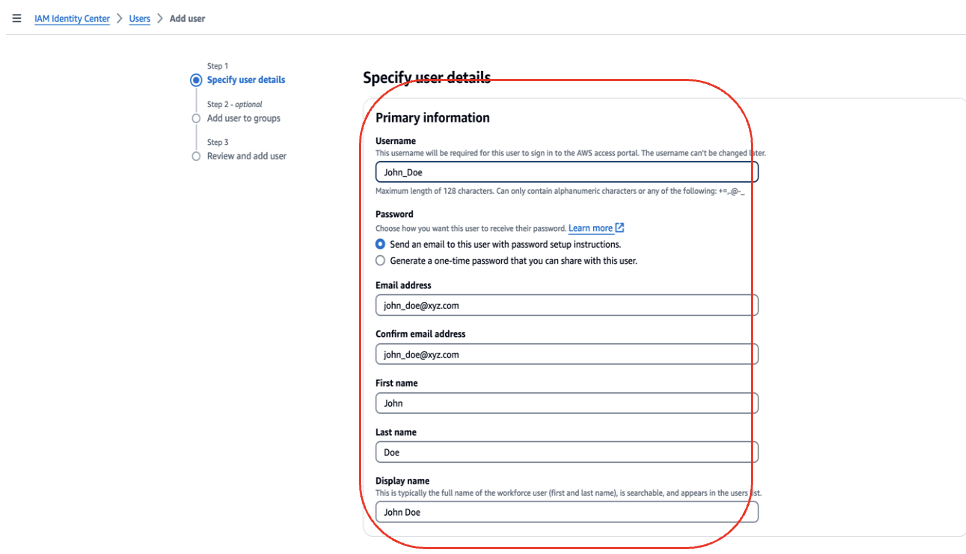
- Choose Add user.
- Enter the following user details:
- Username:
john_doe - Email address:
john_doe@xyz.com(Use or create a real email address for each user to use in a later step.) - First name: John
- Last name: Doe
- Display name: John Doe
- Username:
- Skip the optional fields and choose Next to create the user.
- On the Add user to groups page, choose Next and then choose Add user.
Create the Microsoft Exchange connector for Amazon Q Business
For detailed steps to set up Amazon Q Business, refer to Getting started with Amazon Q Business. To configure the Amazon Q Business connector, complete the following steps:
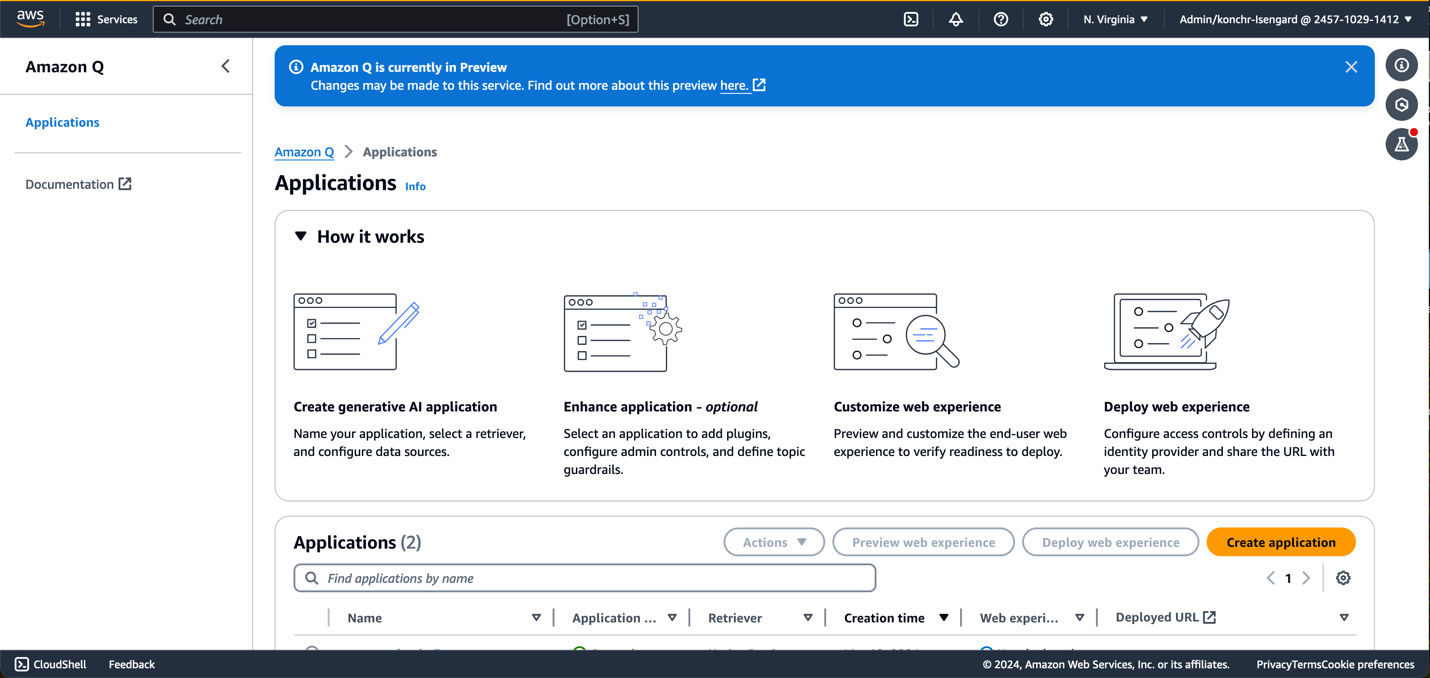
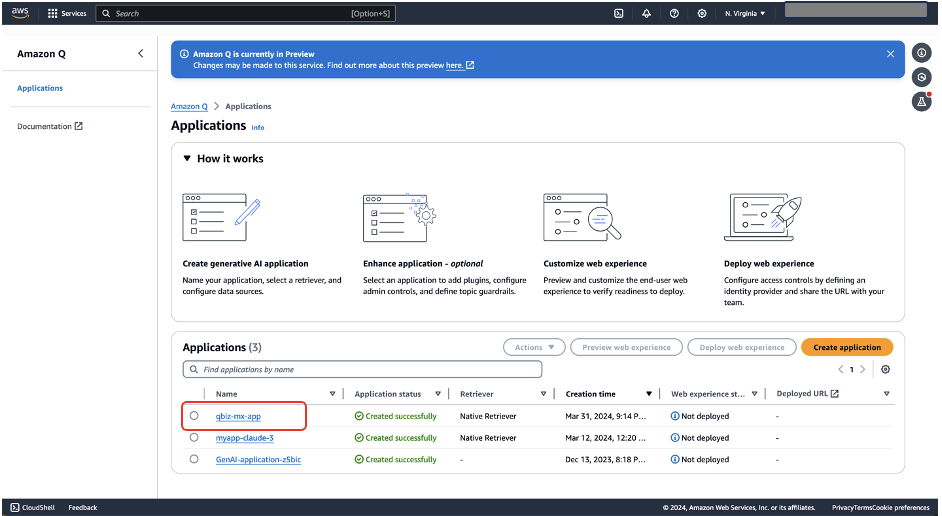
- In the Amazon Q Business console, choose Applications in the navigation pane.
- Choose Create application.
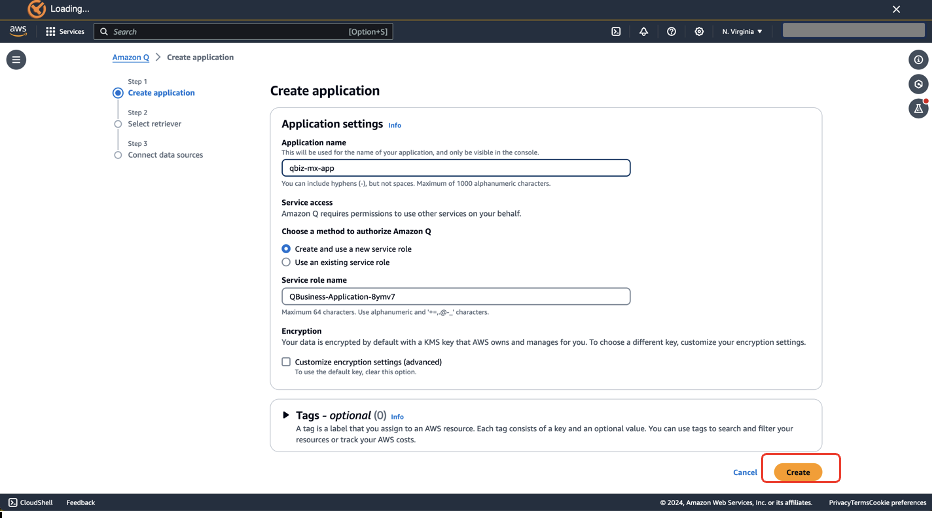
- In the Create application step, for Service access, select Create and use a new service role, then choose Create.
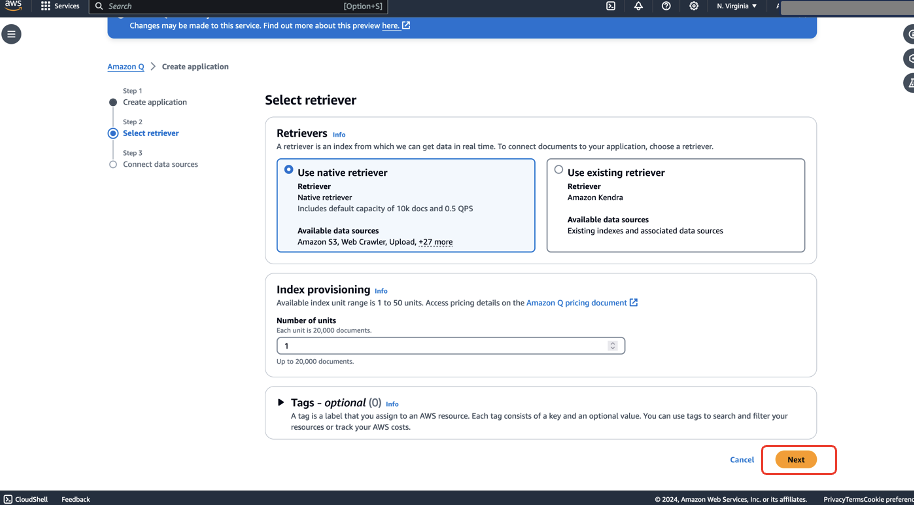
- In the Select retriever step, select Use native retriever and choose Next.
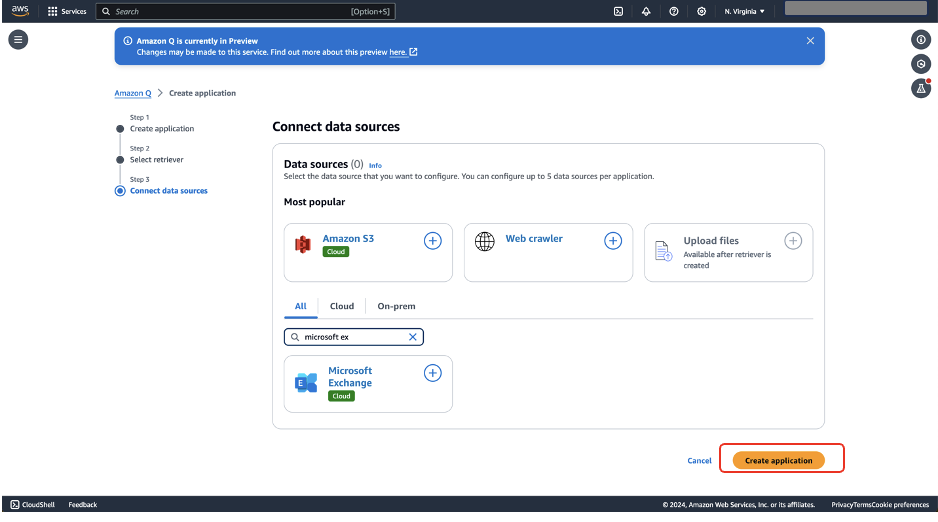
- In the Connect data sources step, search for and choose Microsoft Exchange, then choose Create application.
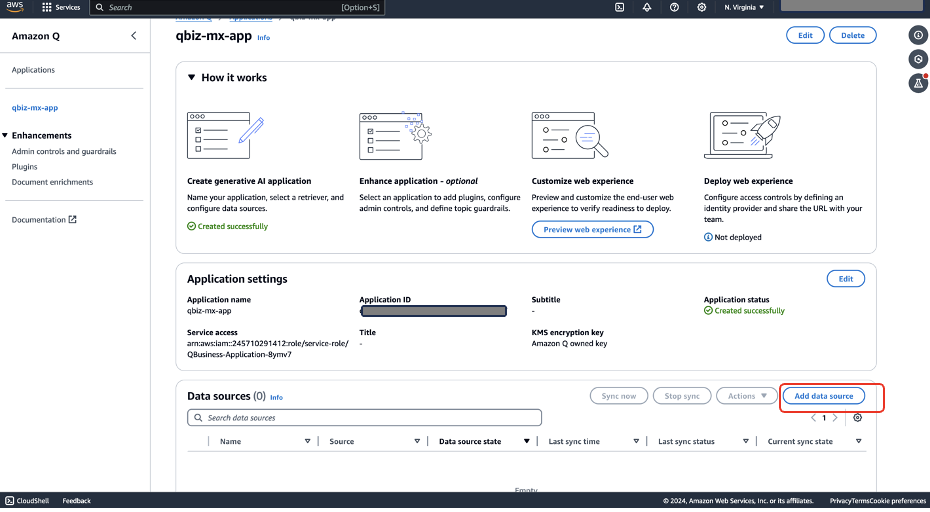
- On the Applications page, choose your application (
qbiz-mx-app).
- In the Data sources section, choose Add data source.
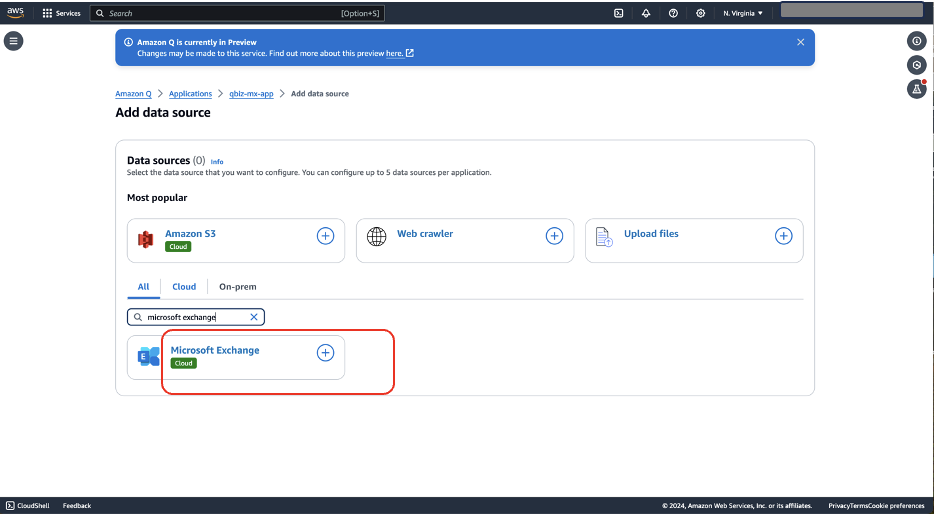
- On the Add data source page, search for Microsoft Exchange and choose the plus sign to configure the data source.
- Enter the name of the data source and the tenant ID noted earlier.
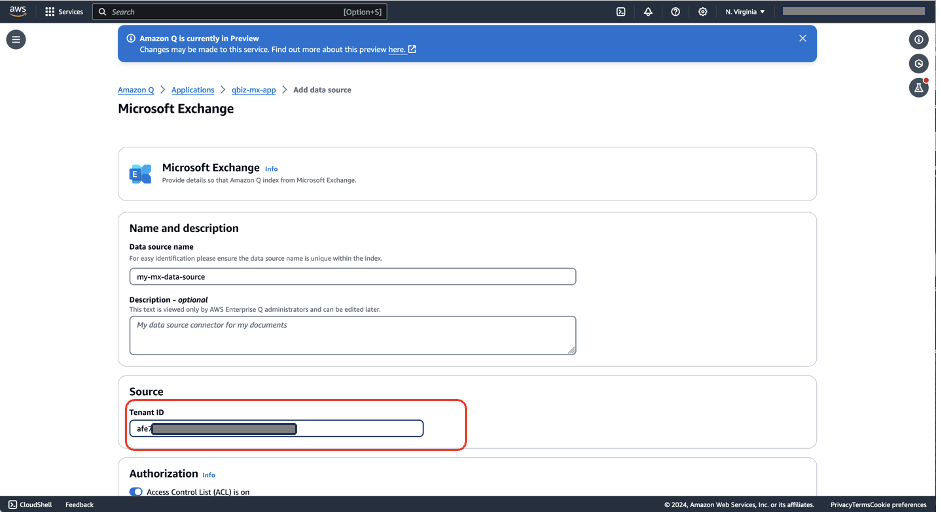
- In the Authorization section, enable Access Control List (ACL).
- In the Authentication section, for AWS Secrets Manager secret, choose Create and add new secret.
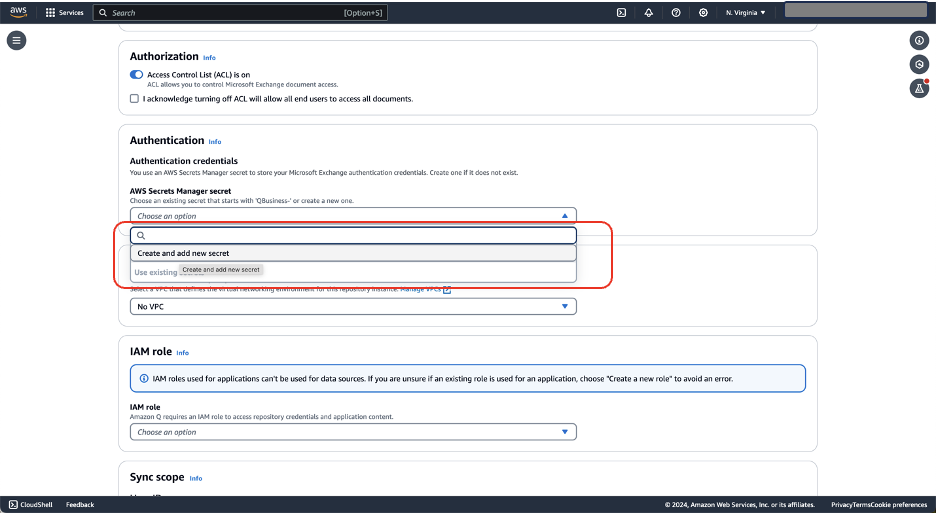
- Enter the secret name of your choice, the client ID and client secret values you noted earlier, and choose Save.

- In the Configure VPC and security group section, leave the settings as default.
- In the IAM role section, choose Create a new service role.
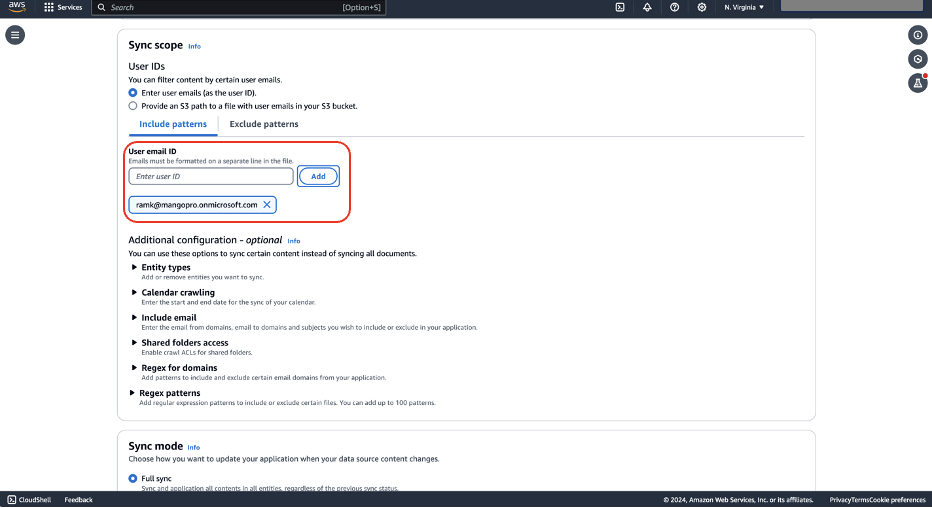
- In the Sync scope section, for User email ID, enter the email of your Microsoft Exchange account and choose Add.
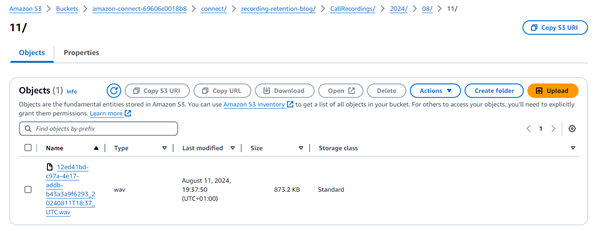
Alternatively, if you have list of user email IDs, you can provide an Amazon S3 path to a file with user emails in your S3 bucket. For more details, refer to Connecting Amazon Q Business to Microsoft Exchange using the console.

- In the Sync mode section, use the default Full sync.
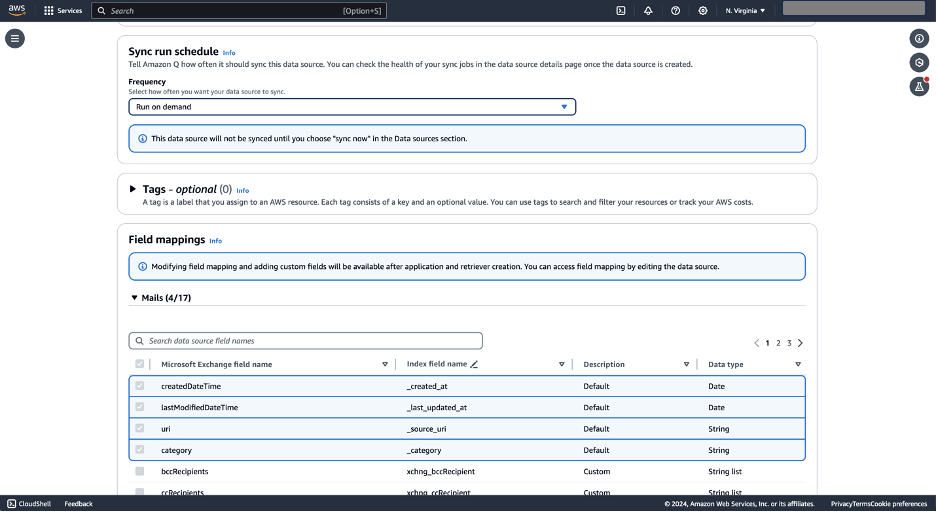
- In the Sync run schedule section, choose the frequency of your choice.
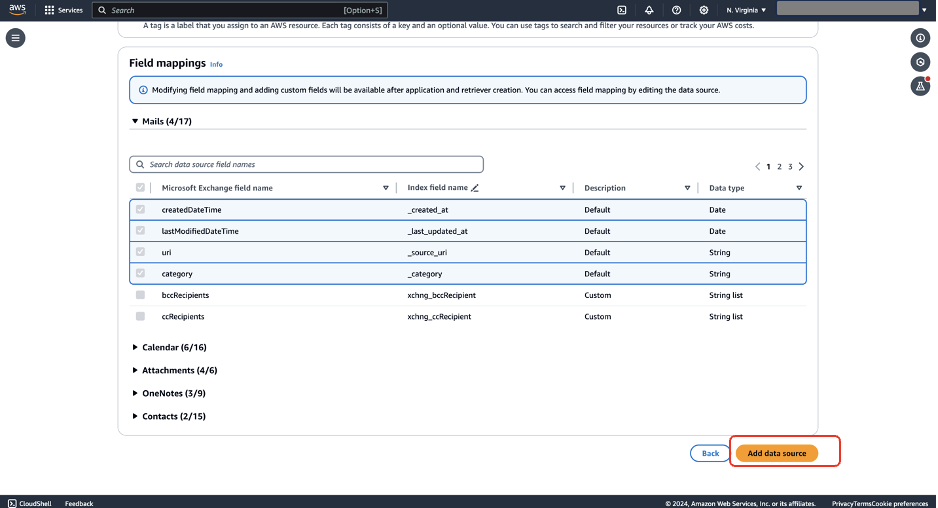
- Leave the remaining sections with default values.
- Choose Add data source.
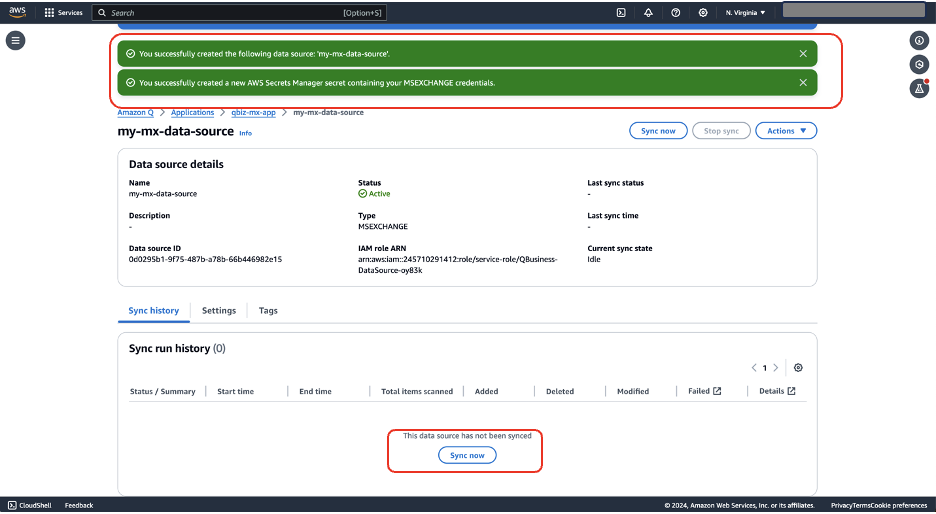
Amazon Q will take 30 seconds to 1 minute to configure your data source. You will see a success banner as shown in the following screenshot.
- Choose Sync now to sync your data source.
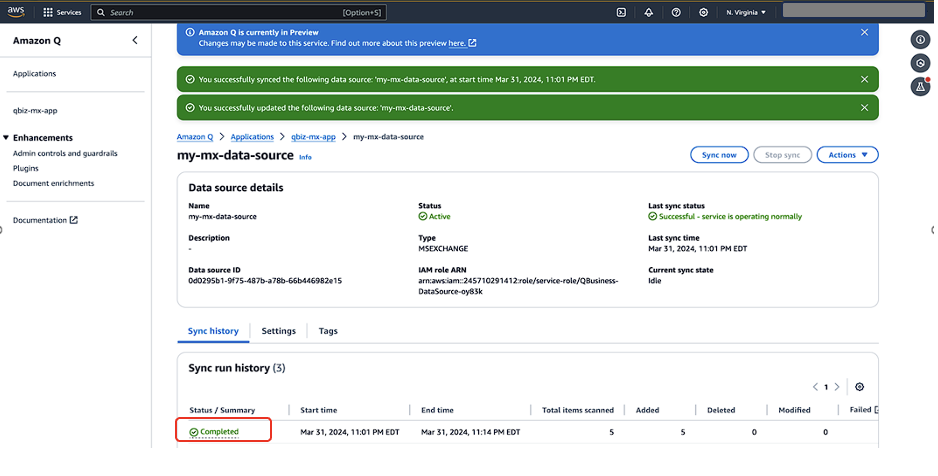
After successfully syncing the data source, you will see the Status / Summary column as Completed.
- For the Update groups and users step, choose Add groups and users.
The users and groups that you add in this section are from the IAM Identity Center users and groups set up by your administrator.
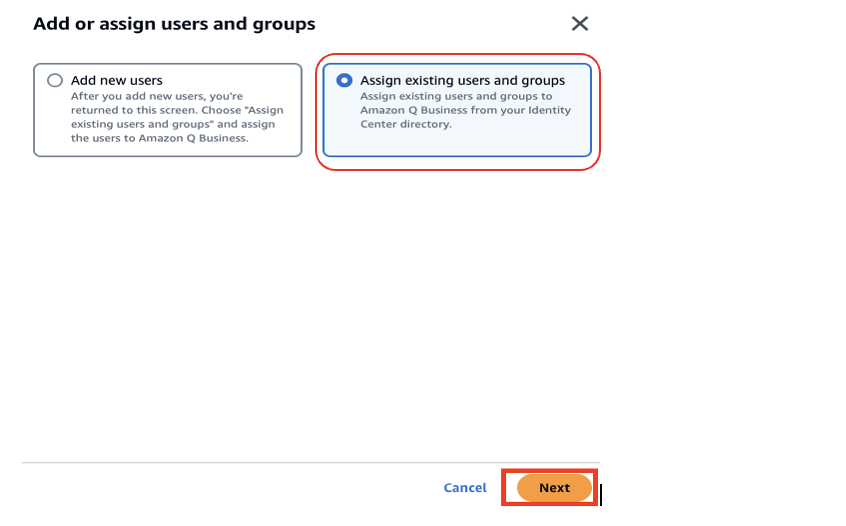
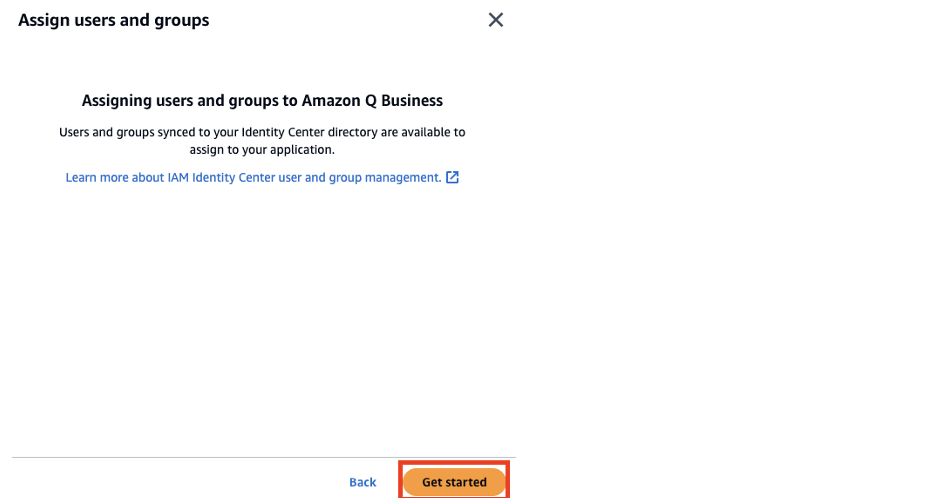
- In the Add or assign users and groups pop-up, select Assign existing users and groups to add existing users configured in your connected IAM Identity Center.
Optionally, if you have permissions to add users to connected IAM Identity Center, you can select Add new users.
- Choose Get started.
- In the Assign users and groups pop-up, search for users by user display name or groups by group name.
- Choose the users or groups you want you add and choose Done.
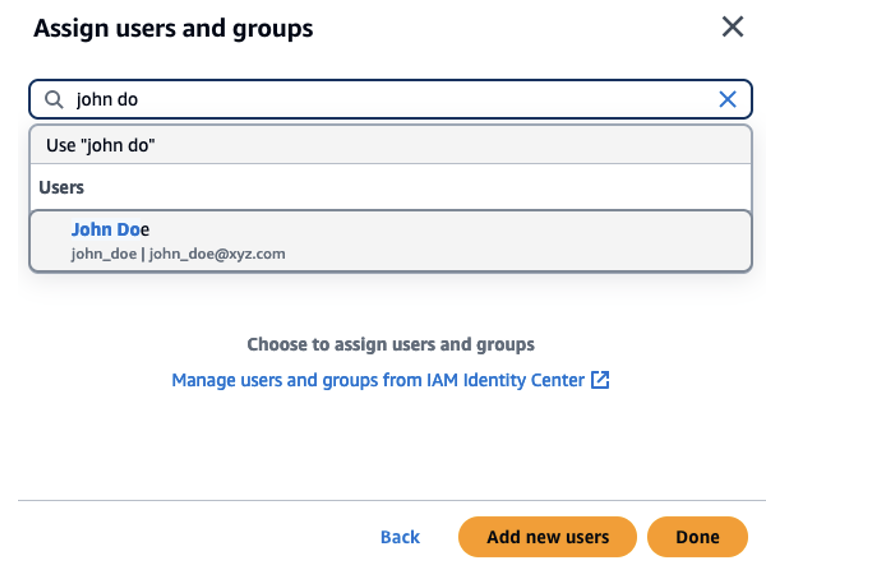
This closes the pop-up. The groups and users that you added should now be available on the Groups or Users tabs.
- Choose Assign.
For each group or user entry, an Amazon Q Business subscription tier needs to be assigned.
- To enable a subscription for a group, on the Update groups and users page, choose the Groups (If individual users need to be assigned a subscription, choose the Users tab.)
- For Subscription, choose Choose subscription and choose a subscription (Q Business Lite or Q Business Pro).
- Choose Update application to complete setting up the data connector for Amazon Q Business.
Query Microsoft Exchange data using the Amazon Q web experience
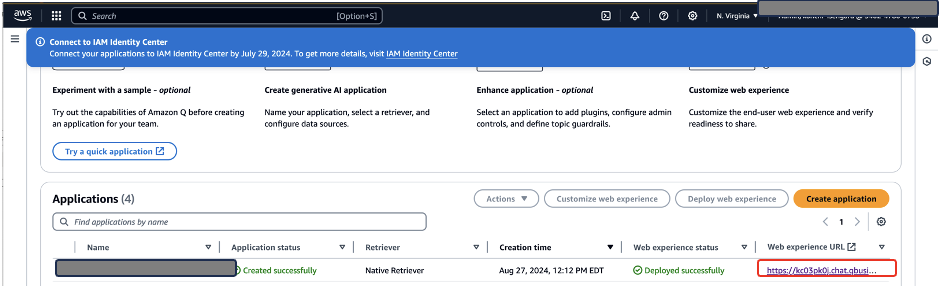
To query the data that is synced through the data source, navigate back to the Amazon Q Business application (qbiz-mx-app) and choose the Web experience URL link.
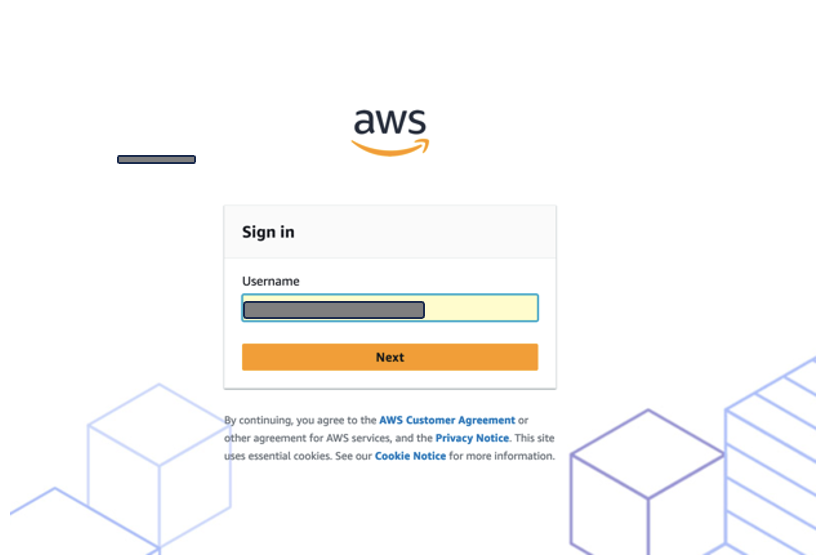
Sign in to the web application using the credentials of the user assigned and configured in IAM Identity Center.
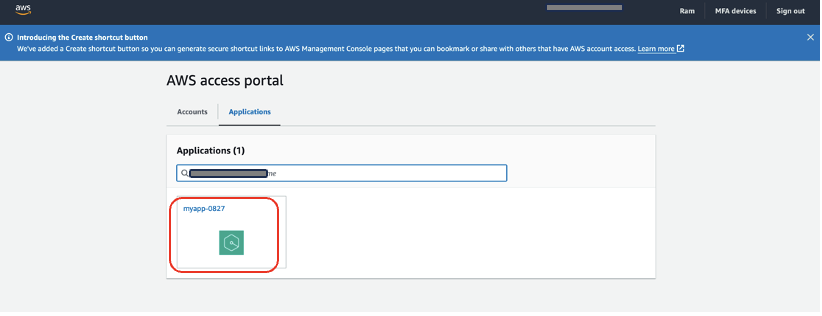
After a successful sign in, the Amazon Q Business application should be displayed in the list of applications, as shown in the following screenshot.
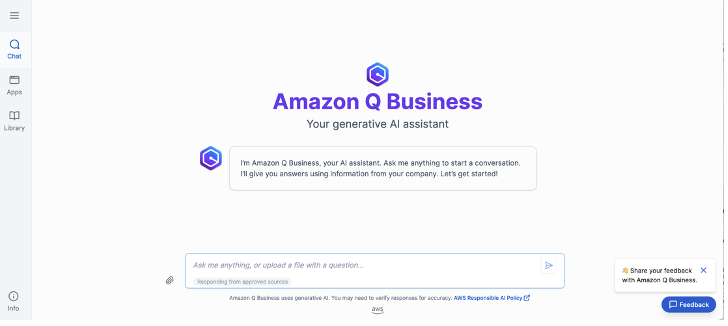
The application link should redirect you to the Amazon Q Business chat application, as shown in the following screenshot.
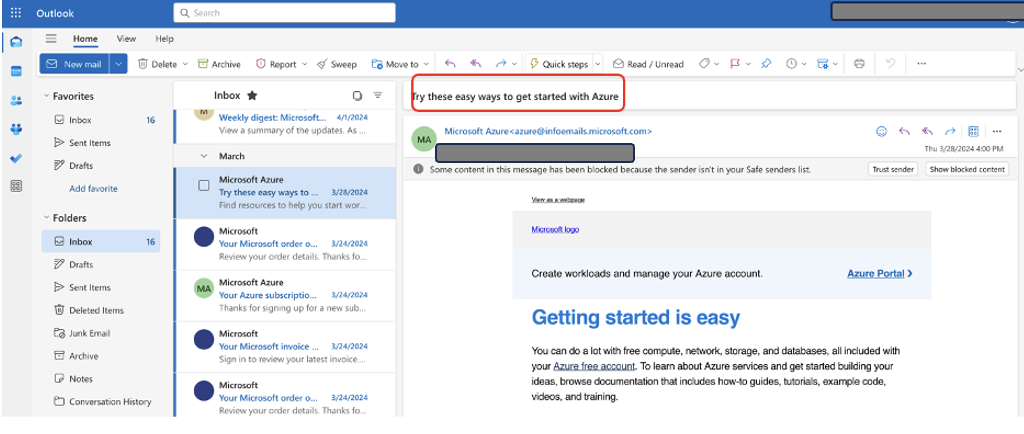
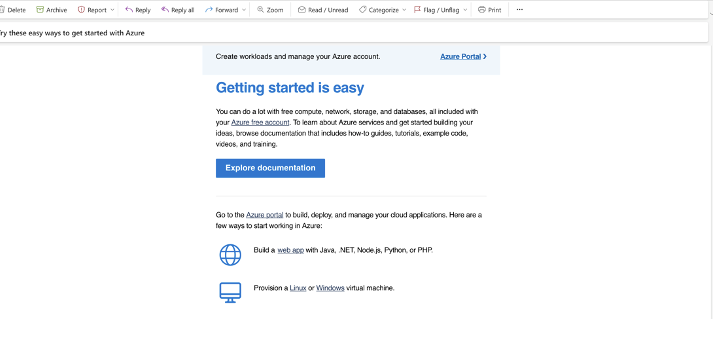
The following screenshot shows the emails that were synced earlier. We will first query based on the content from the email highlighted in this screenshot.
The following screenshot shows the response to the query “what are the easy ways to get started on Azure?”
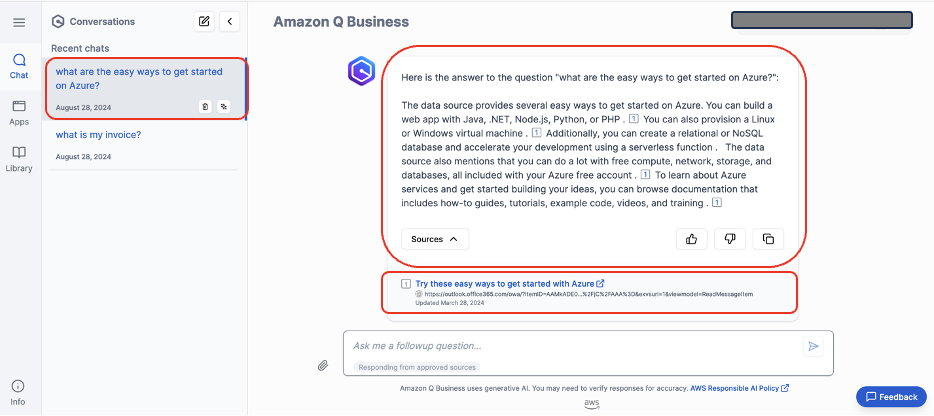
You can choose the data source hyperlink to open the email that the response is based on.
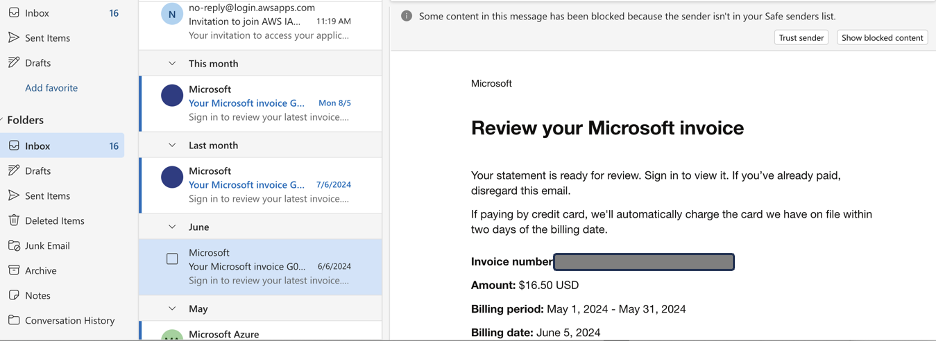
The following screenshot shows an invoice email from Microsoft Outlook, which we will use for another question.
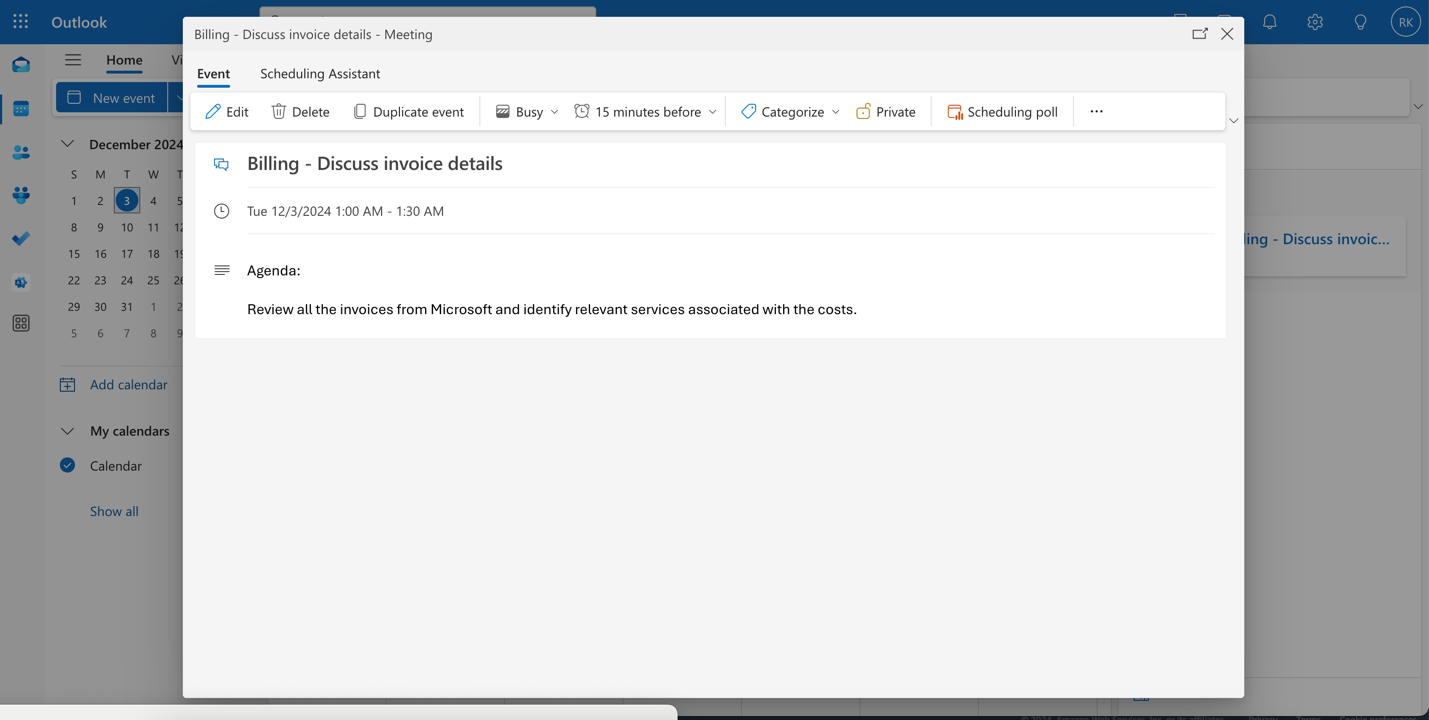
We will also refer to calendar details of a meeting with the billing team along with the agenda details.
We ask the question “Q Assistant, I have a meeting with the billing team tomorrow. Can you summarize the agenda and find relevant information from my emails that I can review in the meeting?” The following screenshot shows the response based on the sample invoices email.
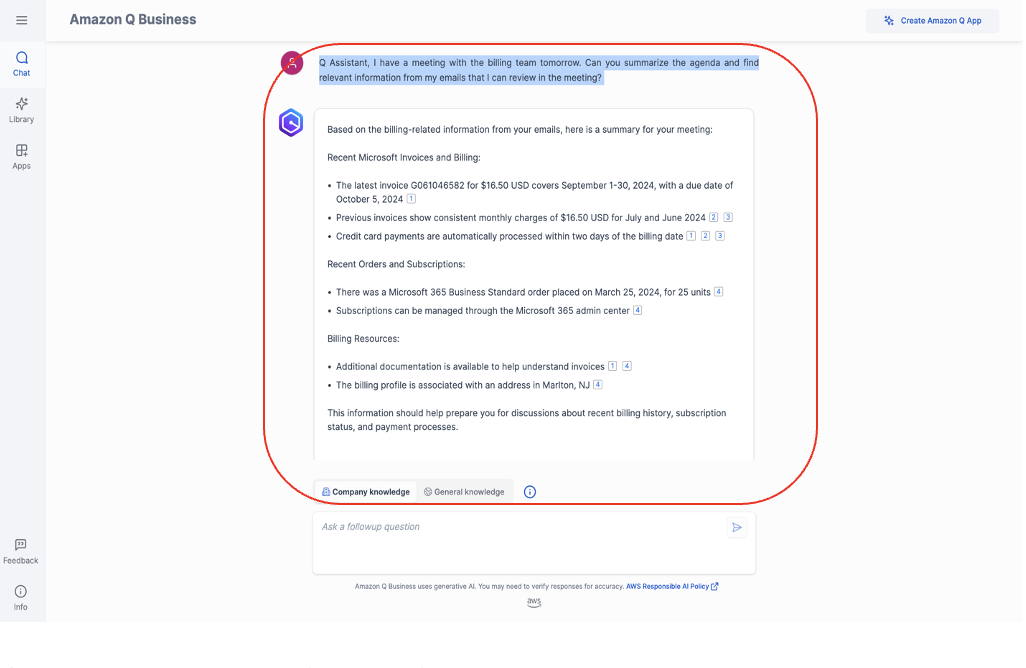
The response included the information from the email along with the hyperlink to the data sources (in this case, it is the hyperlink to the Outlook emails).
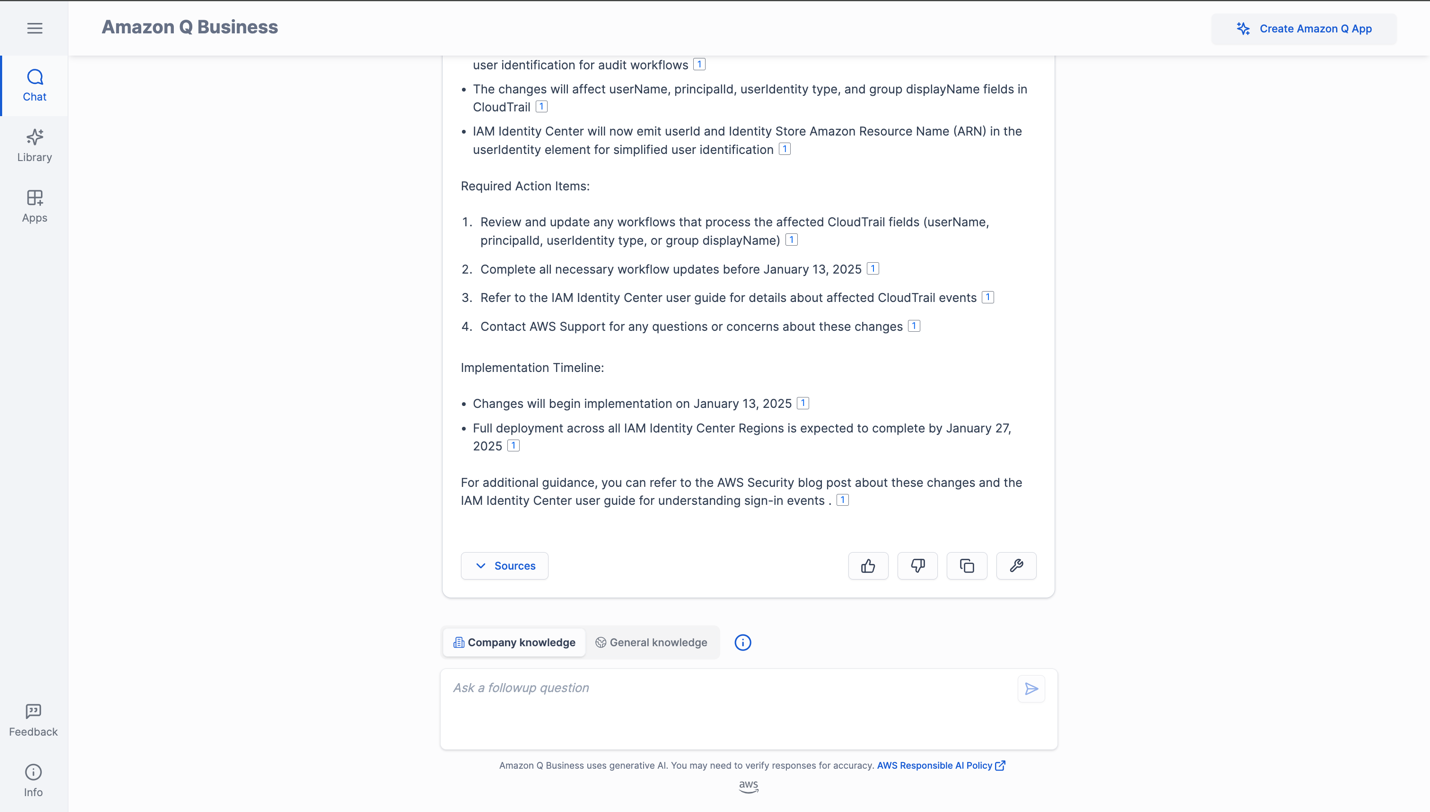
We ask another question: “What are the main features and my actions items relating to the recent CloudTrail changes? By when should I implement the changes?”
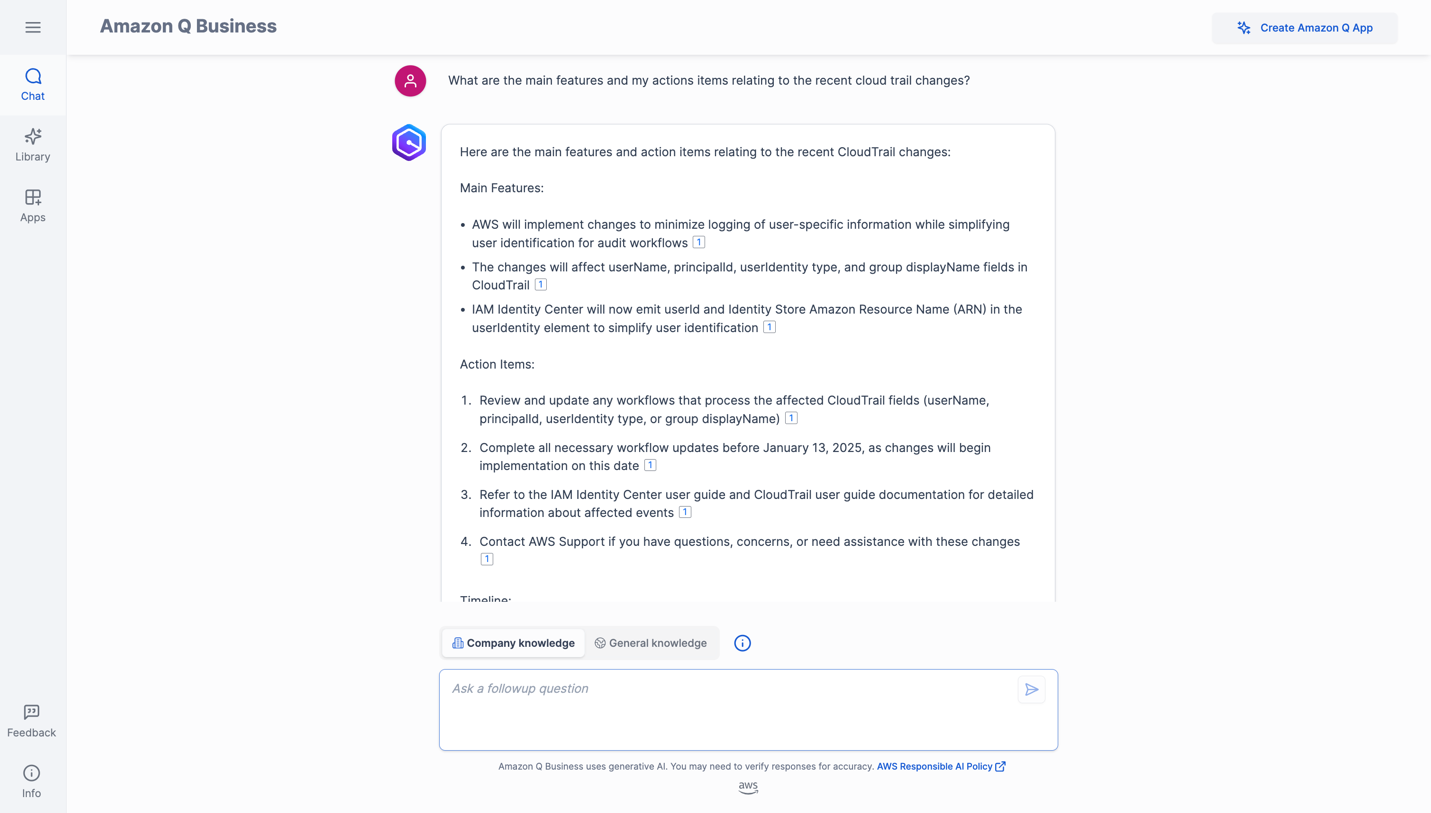
Amazon Q Business retrieved the main features, action items, and the implementation timeline.
Congratulations! You have successfully used the Microsoft Exchange connector for Amazon Q Business to surface answers and insights based on the content indexed from your Microsoft Exchange account.
Troubleshooting
Troubleshooting your Microsoft Exchange connector provides information about error codes you might see for the connector and suggested troubleshooting actions. If you encounter an HTTP status code 403 (Forbidden) error when you open your Amazon Q Business application, it means that the user is unable to access the application. See for common causes and how to address them.
The sync run history report is a new feature now available in Amazon Q Business that significantly improves visibility into data source sync operations. The latest release introduces a comprehensive document-level report incorporated into the sync history, providing administrators with granular indexing status, metadata, and ACL details for the documents processed during a data source sync job.
Frequently asked questions
In this section, we provide guidance to frequently asked questions.
Amazon Q Business is unable to answer your questions
If you get response “Sorry, I couldn’t find relevant information to complete your request,” this might be due to a few reasons:
- No permissions – Access control lists (ACLs) applied to your account don’t allow you to query certain data sources. If this is the case, reach out to your administrator to make sure your ACLs are configured to access the data sources
- Data connector sync failed – Your data connector might have failed to sync information from the source to the Amazon Q Business application. Verify the data connector’s sync run schedule and sync history to confirm the sync is successful.
- Empty mail exchange – Verify that the connected email exchange to Amazon Q has data.
If none of these are true in your case, open a support case to get this resolved.
How to generate responses from authoritative data sources
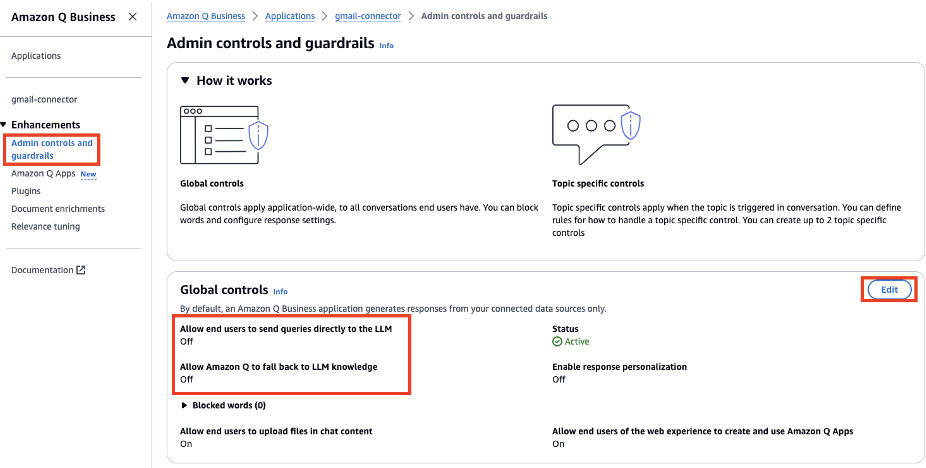
You can configure these options using Amazon Q Business application global controls under Admin controls and guardrails:
- Log in as an Amazon Q Business application administrator.
- Navigate to the application and choose Admin controls and guardrails in the navigation pane.
- Choose Edit in the Global controls section to configure these options.
For more information, refer to Admin controls and guardrails in Amazon Q Business.
Amazon Q Business responds using old (stale) data even though your data source is updated
Each Amazon Q Business data connector can be configured with unique sync run schedule frequency. Verify the sync status and sync schedule frequency for your data connector to see when the last sync ran successfully. Your data connector’s sync run schedule might be set to sync at a scheduled time of day, week, or month. If set to run on demand, then the sync has to be manually triggered. When the sync run is complete, verify the sync history to make sure the run has successfully synced all new issues. Refer to Sync run schedule for more information.
How to set up Amazon Q Business using a different IdP
You can set up Amazon Q Business with another SAML 2.0-compliant IdP, such as Okta, Entra ID, or Ping Identity. For more information, see Creating an Amazon Q Business application using Identity Federation through IAM.
Expand the solution
You can explore other features in Amazon Q Business. For example, the Amazon Q Business document enrichment feature helps you control what documents and document attributes are ingested into your index and also how they’re ingested. Using document enrichment, you can create, modify, or delete document attributes and document content when you ingest them into your Amazon Q Business index. For example, you can scrub personally identifiable information (PII) by choosing to delete any document attributes related to PII.
Amazon Q Business also offers the following features:
- Filtering using metadata – Use document attributes to customize and control users’ chat experience. This is currently supported only if you use the Amazon Q Business API.
- Source attribution with citations – Verify responses using Amazon Q Business source attributions.
- Upload files and chat – Let users upload files directly into chat and use uploaded file data to perform web experience tasks.
- Quick prompts – Feature sample prompts to inform users of the capabilities of their Amazon Q Business web experience.
To improve retrieved results and customize the user chat experience, you can map document attributes from your data sources to fields in your Amazon Q index. Learn more by exploring Microsoft Exchange data source connector field mappings.
Clean up
To avoid incurring future costs, clean up the resources you created as part of this solution. If you only added a new data source using the Microsoft Exchange connector for Amazon Q Business, delete that data source.
Complete the following steps to clean up your resources:
- Open the Office 365 Admin Center using the account of a user member of the Tenant Global Admins group.
- Navigate to the Microsoft Azure Portal.
- Search for and choose App registrations.
- Select the application you created earlier, then choose Delete.
- On the Amazon Q Business console, choose Applications in the navigation pane.
- Select the application you created, and on the Actions menu, choose Delete.
- Delete the users that were added in IAM Identity Center.
Conclusion
With the Microsoft Exchange connector for Amazon Q Business, organizations can tap into the repository of information stored in their account securely using intelligent search powered by Amazon Q Business.
To learn about these possibilities and more, refer to the Amazon Q Business User Guide. For more information on how you can create, modify, or delete metadata and content when ingesting your data from Microsoft Exchange, refer to Enriching your documents during ingestion.
About the Authors
 Ram Konchada is Senior Solutions Architect at AWS. He loves helping customers achieve their business goals using technology. Outside of work, Ram enjoys playing tennis.
 Armstrong Onaiwu is a Solutions Architect at AWS. He is deeply passionate about technology and helping customers use AWS services to address business challenges. He specializes in designing highly scalable, resilient, and cost-effective network solutions on AWS. When not spending time with his family, Armstrong enjoys traveling and playing FIFA.